This guide to the RLRA Risk Mitigation Program(RMP) is a resource and training tool for property owners & managers and supportive housing service providers working with RLRA.
NOTICE: HDC IS CURRENTLY NOT ACCEPTING ACH TRANSFER REQUESTS AT THIS TIME.
CHECKS WILL BE SENT DIRECTLY TO THE PROPERTY VIA MAIL.
When filling out your “Owner Information” form, please do not opt into ACH transfers and enter in a valid Mailing Address to receive your claim check.
UPDATES WILL BE PROVIDED ON THIS PAGE.
Overview
RLRA Risk Mitigation Program
What is it?
The RLRA Risk Mitigation program is a financial protection offered to property owners and managers to reimburse costs created by RLRA households. It also functions as a barrier reduction tool for households and eviction prevention tool.
The RLRA RMP is
Financial Protection
Eviction Prevention
Barrier Reduction
Rent/Utility Assistance
FAQ available at bottom of page
Who gets the money?
The funds are a reimbursement to properties for costs incurred or owed by the RLRA household. This removes the balance for the household and enables properties to mitigate costs.
Maximum amount is $5000
up to $25,000 for multi-unit claims
Property receives funds as reimbursement
For all claims under the $5000 limit, a 5% administration cost is added to the claim.
Example
Claim Amount: $1000
5% of $1000 = $50
Reimbursement amount: $1050
When to Use the RLRA RMP
Funds can be accessed during and after tenancy. Almost anytime money is owed to a property by an RLRA household, likely the RMP can be used to pay some or all of the balance.
Most Common Examples
Past due rent or utilities
Unit/common area damages
Appliance damage/replacement
Funded by: Metro SHS Measure
Managed by: Housing Development Center (HDC)
Property Eligibility
A property must be currently renting or have rented to an RLRA household within the past 12 months. Funds are only eligible for costs incurred by the RLRA household and cannot be used to pay any entity other than the property.
If the answers to the following questions are yes, you are likely eligible to file a claim.
Do you rent to an RLRA Household?
Does that household owe money to the property?
Claim Limits
Single Unit Claim
The maximum amount for a single unit, regardless of size, is $5000 per tenancy.
Multi-unit Claim
Claims where more than one unit was affected are eligible for $5000 per unit with a maximum of $25,000.
Two Types of Claims
Operational Loss
An operational loss is any cost that a property incurs during tenancy that does not result in a physical repair/change to the property.
Physical Damage/Repair
Physical damage/repair is any cost incurred by a property that requires a repair or replacement of a physical asset in a unit or common area beyond normal wear and tear.
Step 1
Collect documentation
Step 2
Complete Online Claim Form
The Process
Step 3
Submit “Owner Information” Form
Step 4
Await Approval/Appeal Letter
Confused about eligible expenses?
If the cost is being billed to the tenant and appears on the ledger, it more than likely is eligible!
Step 5
Receive Funds
Step One
Collect Documentation
Required Documents for All Claims
Tenant Lease - To verify property and unit information
Tenant Ledger - To ensure the charges are being billed to the tenant
Proof of Rental Assistance at property
Housing Authority Agreement for Rental Assistance (ARA) or
Housing Authority New Rent Letter (NRL)
Property W9 - For payment verification
Additional Documents for
Physical Damage Claims
In addition to the above documents, physical claims require
Any invoices, work orders, and/or bids matching the damage amounts on the ledger
Move-in/move-out condition form
Optional: any photos or evidence of damage
Operation Losses
An operational loss is any cost that a property incurs during tenancy that does not result in a physical repair/change to the property.
Common Examples of Eligible Expenses
90-days of household rent portion
Unpaid utilities owed to the property
Lease Break Fee
Late Fees
Other Miscellaneous fees (re-key, VCR, etc)
Pest removal
Physical Damages/Repairs
Physical damage/repair is any cost incurred by a property that required a repair or replacement of a physical asset in a unit or common area beyond normal wear and tear.
Common Examples of Eligible Expenses
Appliance repair/replacement
Drywall patching/replacement
Painting due to excessive damage
Fire or water damage
Step Two
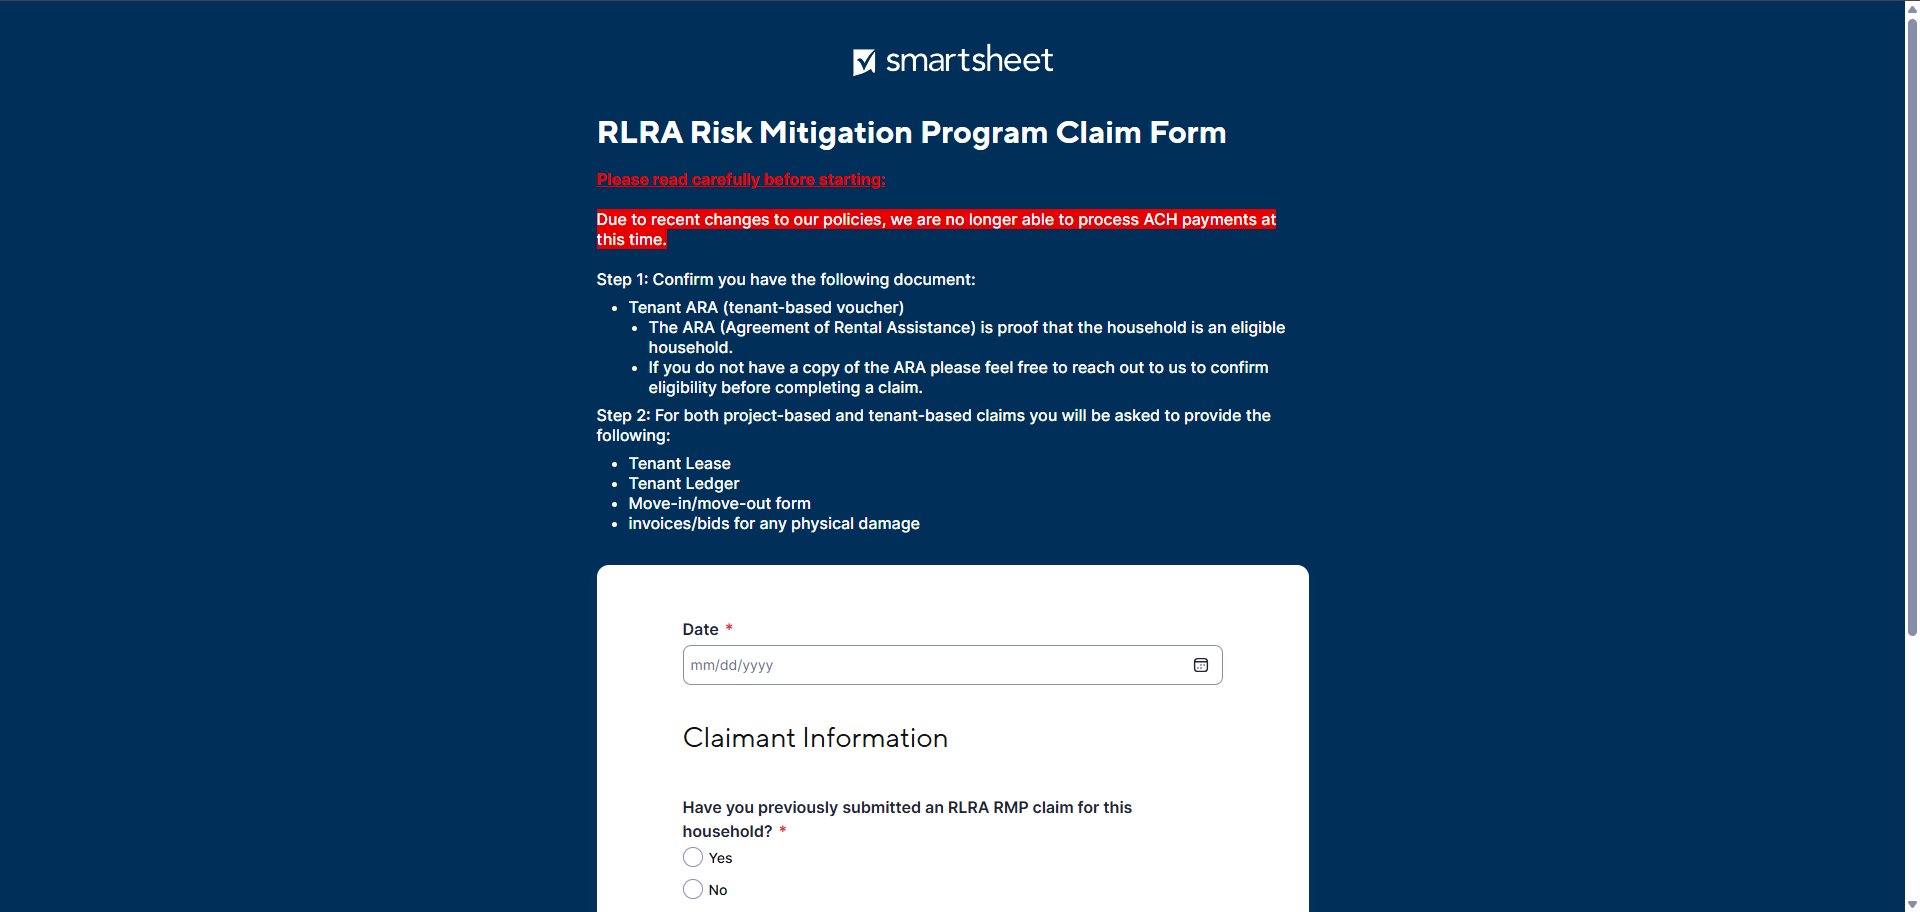
Complete Online Claim Form
Online Claim Form Link
https://app.smartsheet.com/b/form/00e3bc1d8d34446598a8e0046ea6ee37
Confirm you have the following documents:
REQUIRED:
Tenant Lease
Tenant Ledger
Proof of Rental Assistance at property
Housing Authority Agreement for Rental Assistance (ARA) or
Housing Authority New Rent Letter (NRL)
Property W9
2) Physical Damage itemization
Basic Information
Does Your Claim Include Physical Damage?
Date of Damage/Incident
Briefly describe what happened to the unit(s)
Individual physical claim information
Damage Location
Vendor
Invoice #
Item(s)
Description of Damage
Dollar Amount Applicable to Claim
Confirmation Step
Excessive Property Damage Itemization Notes - check yes if physical damages
Will also receive an additional 5% administration fee
For Physical Claims ONLY:
Invoices/Bids/Work Orders
Move-in/Move-out Form
Prepare Claim Workbook
1) General Information
Today’s Date
Have you previously submitted an RLRA RMP claim? - if yes, enter previous claim amounts
Indicate property owner/manager or service provider/case manager
Enter relevant contact information
Enter property address information
Project-based vs. Tenant-based RLRA (99% of the time it will be tenant-based RLRA)
Tenant moved out
Damage to additional units - up to 4 extra units (common areas count as one extra unit)
3) Operational Loss Itemization
Basic Information
Does Your Claim Include Operational Losses?
Date that the Operational Losses Ended
Briefly describe the situation, including, if applicable, dates of any legal action
Rent Owed by Household Utilizing RLRA
Lost Rent for Unit
Other Operational Losses
Other Operational Loss Category
Vendor
Invoice #
Explanation/Reason for Operational Loss
Dollar Amount Applicable to Claim
Date ended (last date of charge on ledger), describe what for, rent owed up to 90 days, lost rent after move-out, other operational losses (unpaid utilities, legal fees, lease break fees, etc.)
Excessive Operational Loss Itemization Note
4) Additional Information
Required Documents (please review above)
Optional Survey
Send me a copy of the responses (always check yes and enter email)
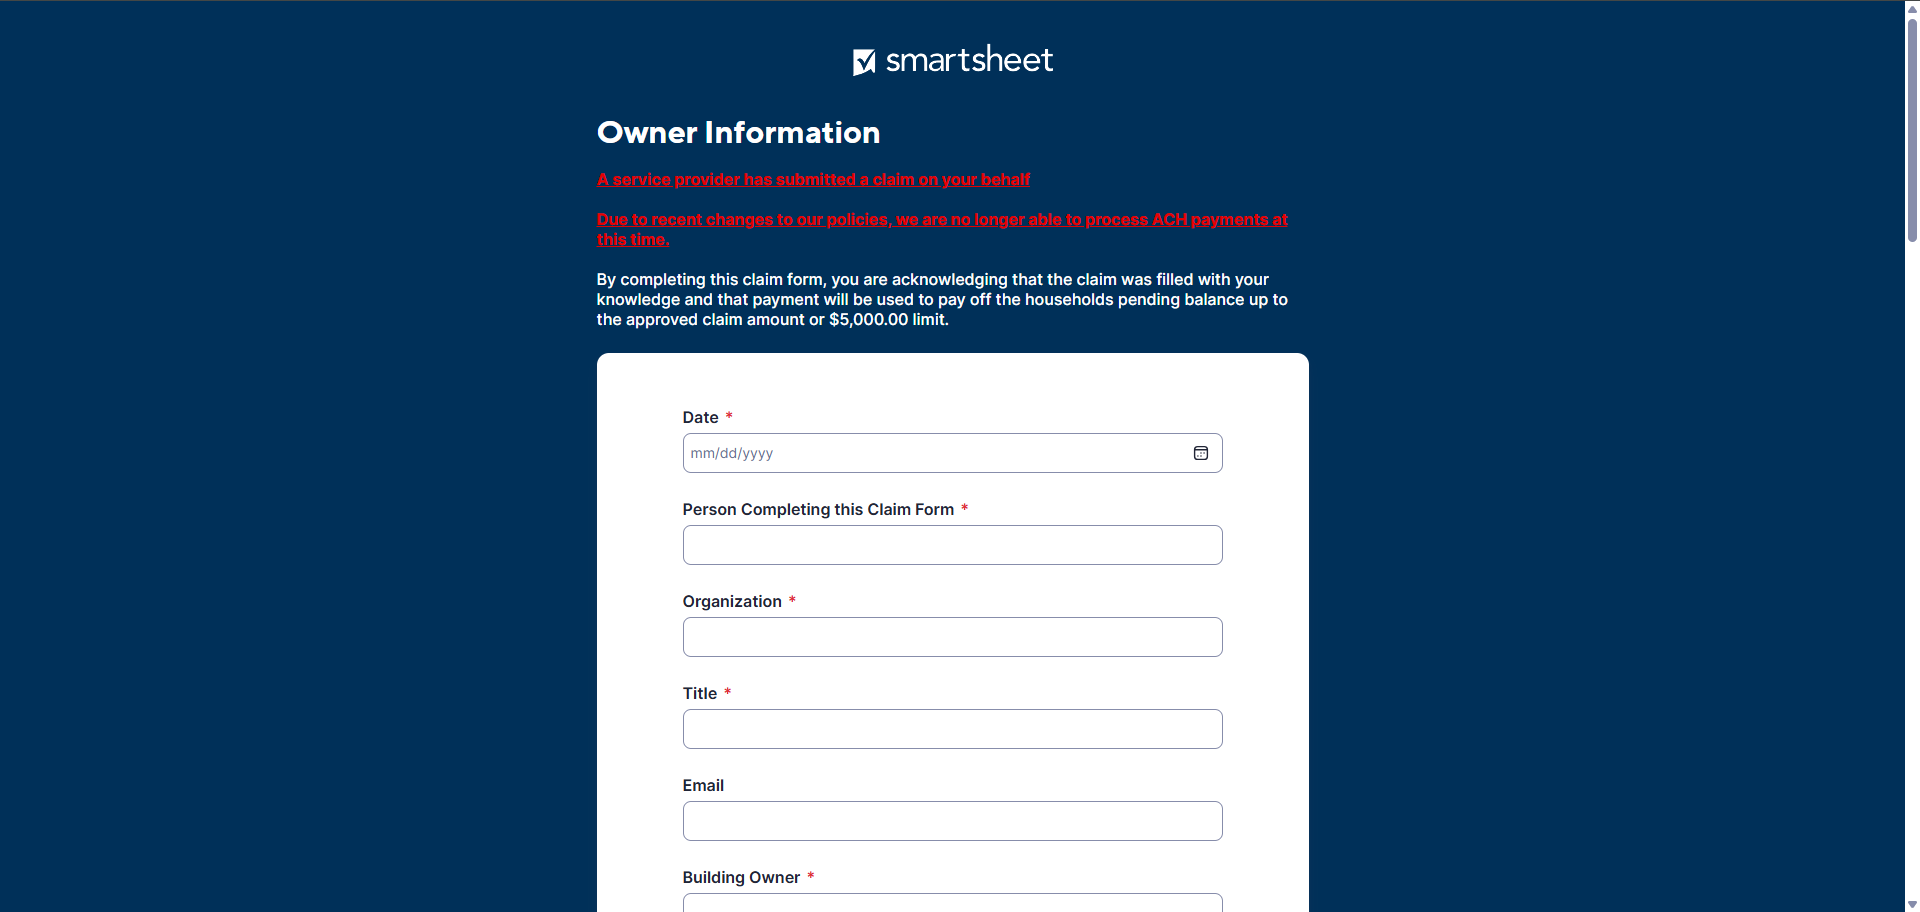
Step Three
Submit the Owner Information Form
If a service provider submitted on your behalf, you will receive an email from rlrarmp@hdc-nw.org. If not, please skip to the next step.
How To Fill Out
Please fill out your mailing address that you would like the check to be sent to. Please ensure that it is a physical address that receives mail, as the check can sometimes be lost at general property addresses.
NOTE: The check will NOT have HDC as the sender and will be addressed from their bank. Please keep an eye out for any mail that may look like spam.
Step Five
Receive Funds
The approved funds will be reimbursed in the method established in the “Owner Information”, ACH transfer or a mailed check.
Funds can take up to 120 days to be delivered but typically are delivered in 60 days from the approval date.
HDC IS CURRENTLY NOT ACCEPTING ACH TRANSFERS AT THIS TIMEStep Four
Approval Letter
HDC will send out a email titled “RLRA Claim Letter” attached with your Approval Letter. Please review the approval amount and the estimated issue date to your property.
Please look for an email from rlrarmp@hdc-nw.org.
FAQ
When will funds for approved claims be delivered to the property?
Funds are delivered within 120 days of claim approval but are typically received by the property within 65 days.
How is the reimbursement sent?
The reimbursement can be delivered via digital ACH transfer or mailed check. This is established in the “Owner Information” form once the initial claim form is sent.
*NOTE: HDC is currently not accepting ACH transfers at this time. Please keep an eye out for updates on this page.
Does the $5000 limit reset if a household moves to a new property?
Yes. However if they stay at the same property but change units, the limit does not reset.
Can Risk Mitigation funds be used to pay utility bills?
It depends! If the utilities are owed to the property they are eligible. If they are owed to the utility provider (e.g. PGE, NW Natural) they are not eligible.